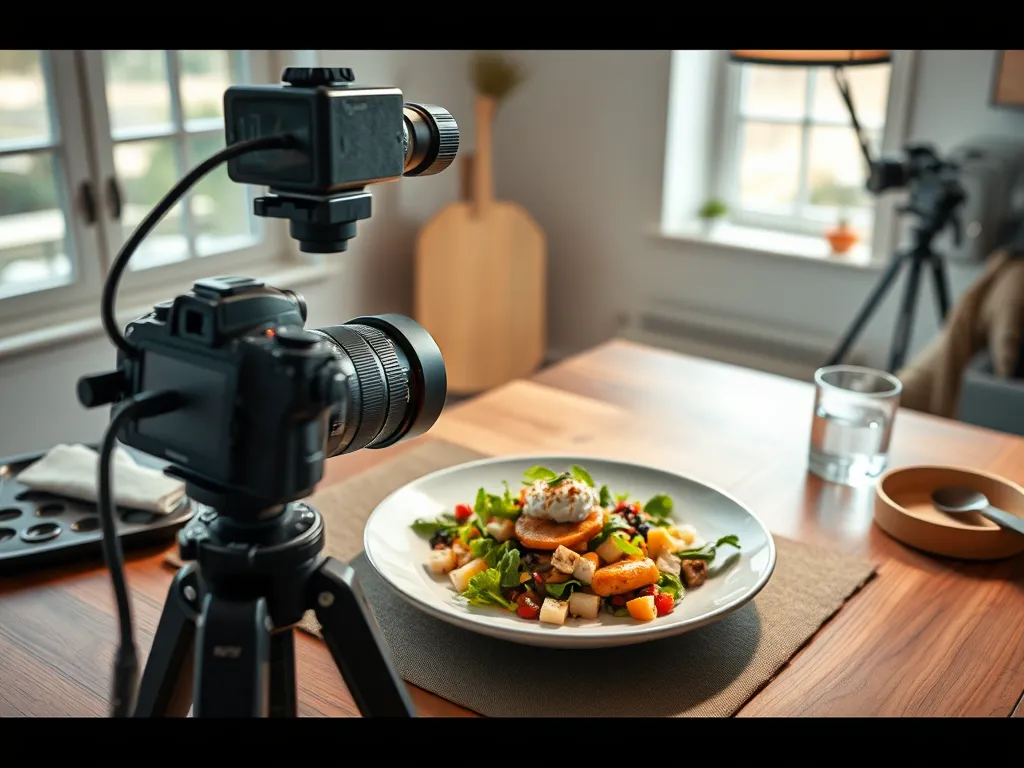
Food photography is more than just a trend; it plays a crucial role in the culinary world and on social media platforms, captivating audiences with enticing visuals. In this article, we will explore essential tips and techniques for capturing stunning food images, including composition, lighting, equipment, and styling. Whether you’re a budding food enthusiast or a seasoned photographer seeking to elevate your skills, you’ll find valuable insights to inspire your creativity and enhance your photography experience.
1. Understanding Food Photography Basics
Composition Techniques:
Composition is crucial in food photography to create visually striking images that capture attention.
- Rule of Thirds and Framing: Utilizing the rule of thirds can help position your food attractively within the frame. This technique involves dividing the image into a 3×3 grid, placing the main subject along the grid lines or at their intersections for a balanced composition.
- Creating Depth with Layering and Foreground Interest: Incorporate layers in your photographs to add depth. Place elements like utensils, napkins, or fresh ingredients in the foreground to draw viewers into the scene and create a three-dimensional feel.
Lighting Essentials:
Lighting can make or break a food photograph, so understanding how to use it effectively is vital.
- Importance of Natural Light versus Artificial Light: Natural light is often the best choice for food photography, as it enhances the colors and textures of the food naturally. If shooting indoors, try to position your subject near a window. However, if natural light isn’t available, understanding how to manipulate artificial lighting can also yield excellent results.
- Using Diffusers and Reflectors for Optimal Results: To soften harsh shadows from direct sunlight, use diffusers; these can be white sheets or specialized products. Reflectors can bounce light back onto your subject, brightening up shadowed areas for a more evenly lit image.
Choosing the Right Equipment
Camera Options
When it comes to food photography, selecting the right camera is vital for capturing stunning images. There are two main types of cameras to consider:
- Smartphone Cameras:
- Advancements in smartphone technology have led to impressive camera capabilities. They are portable, user-friendly, and perfect for spontaneous shots.
- Ideal for beginners or casual photographers. Apps for editing and enhancing images are widely available.
- DSLR Cameras:
- DSLRs offer superior image quality and flexibility. The ability to manually adjust settings allows for greater creative control.
- A DSLR is recommended for those serious about food photography, as it can produce professional-grade images.
Lens Selection
Choosing the right lens can dramatically impact the quality of your food photos. Here are some recommendations:
- Recommended Lenses for Food Photography:
- A 50mm lens is often considered a « nifty fifty » for its versatility and the low aperture, allowing for shallow depth of field.
- A 35mm lens provides a wider perspective while still maintaining a natural look.
- Macro Versus Wide-Angle Lenses:
- Macro Lenses: Perfect for capturing intricate details, such as textures and small garnishes. Ideal for close-up shots of food.
- Wide-Angle Lenses: Useful for broader compositions and including more elements of the setting, providing context to the food.
Investing in quality equipment tailored to your needs is essential for elevating your food photography game.
3. Mastering Food Styling
Plate Presentation:
Arranging food aesthetically on the plate is crucial for enticing food photography. Consider the following techniques:
- Create Height: Use varying heights to create visual interest. Stack ingredients or use stands for a more dynamic presentation.
- Negative Space: Leave space on the plate to draw attention to the food. A cluttered plate can overwhelm the viewer.
- Garnishes and Props: Enhance the appeal by adding fresh herbs, edible flowers, or props like cutlery and napkins that complement the dish.
Color Theory:
Colors play a significant role in attracting viewers’ attention. Here’s how to effectively utilize color in your food photography:
- Contrasting Colors: Use contrasting colors to make your subject stand out. For example, a vibrant green mint garnish on a rich brown dessert can create a striking image.
- Complementary Palettes: Choose a color palette that works harmoniously. Pair colors that are complementary on the color wheel for a balanced look.
- Background Selection: The background can significantly impact the color dynamics; opt for backgrounds that enhance your dish without overshadowing it. A neutral backdrop often works best to let the food shine.
Tips for Capturing Stunning Images
Angles and Perspectives:
- Different Angles: Experiment with various angles to see which showcases your dish best. Common angles include:
- Top-Down: Ideal for flat-lay setups, capturing the entire table or platter while highlighting multiple dishes.
- Eye-Level: Great for showcasing the details of a dish, making the viewer feel like they are right in front of the plate.
- Side: Use this angle to emphasize height and layers, particularly effective for stackable foods like burgers or cakes.
- Unique Perspectives: Don’t be afraid to explore unconventional viewpoints. Try shooting from a low angle or close-up to create a dramatic effect or to accentuate textures and colors in your food.
Storytelling in Photography:
- Creating Narratives: Food photography should tell a story. Consider incorporating elements that provide context, such as utensils, ingredients, or even the cook’s hands. This engages viewers, encouraging them to imagine experiencing the meal themselves.
- Value of Context: Adding a personal touch or narrative can enhance your images. Use props reflecting cultural significance or a casual dining atmosphere, which helps to create an emotional connection with your audience.
By implementing these tips on angles, perspectives, and storytelling, you can elevate your food photography, making your images not just visually appealing but also compelling and engaging.
5. Post-Processing Techniques
Editing Software Options:
When it comes to editing food photography, choosing the right software is essential. Popular tools like Lightroom and Photoshop are widely used by professionals for their extensive capabilities. Lightroom is excellent for bulk editing and color correction, while Photoshop offers advanced manipulation features for detailed adjustments.
Here are some basic editing techniques to enhance your images:
- Adjust exposure and contrast to make your food pop.
- Crop the image to improve composition and remove distractions.
- Use sharpening tools to bring out textures in the food.
Color Correction and Filters:
Maintaining a natural appearance in food photography is crucial. Ensure that colors look true to life to prevent misrepresentation of the dish. Here are some best practices for color correction:
- Use the white balance tool to eliminate color casts.
- Adjust vibrance and saturation carefully; avoid overdoing it to keep images realistic.
When applying filters, aim for subtlety. A well-placed filter can enhance mood but excessive use can detract from the food itself. Always compare edited images to the original to maintain quality.
6. Sharing and Promoting Food Photography:
- Social Media Platforms:
- Best platforms for sharing food photography include Instagram and Pinterest, which have visually driven audiences.
- Utilize relevant hashtags like #FoodPhotography and #InstaFood to increase visibility and engage with the community effectively.
- Building a Portfolio:
- Creating a cohesive style through consistent editing and presentation is crucial for establishing a recognizable brand.
- Develop an online presence by using portfolio websites and social media profiles to attract potential clients and showcase your best work.
7. Common Mistakes to Avoid in Food Photography:
- Overlooking Lighting:
- Relying solely on artificial light can lead to unappealing images. Always prioritize natural light when possible.
- Ignoring Cleanliness:
- Unwanted crumbs or smudges can distract from the food. Ensure your scene is tidy and well-composed.
- Neglecting Backgrounds:
- Busy or cluttered backgrounds can overshadow the food. Choose simple, complementary backgrounds that enhance the dish.
- Forgetting About Texture:
- Focusing only on color and shape can miss the nuances of texture. Highlighting textures can add depth and interest to your images.
- Not Practicing Enough:
- Food photography skills develop over time. Regular practice is essential for improvement, so don’t shy away from experimenting.
Conclusion:
In this article, we explored the world of food photography, highlighting essential tips and techniques to elevate your images. We discussed the importance of composition and lighting, the equipment you’ll need, and effective food styling strategies. Additionally, we covered various angles and perspectives for capturing stunning images, as well as post-processing techniques to enhance your photos. Finally, we emphasized the significance of sharing and promoting your work on social media.
- Food photography skills develop over time. Regular practice is essential for improvement, so don’t shy away from experimenting.
We encourage you to practice food photography and experiment with the ideas shared in this article. Join food photography communities to share your work, gain feedback, and grow your skills. For more in-depth resources and inspiration, explore our related articles on food photography techniques. Don’t forget to subscribe to our newsletter for continuous updates and tips. We hope you found this article valuable, and we can’t wait to hear about your food photography experiences in the comments below!


